Posted on

How to Make Money from Home Using 3d Printer | 15 Money Printing Ideas

3D printing has been taking off in a big way over the last decade. Hobbyists, artists, and designers have many opportunities to make money with their 3D printers. We’ve made a list of 15 of the best ways to cash in on this market! If you love to use your 3D printing skills, one of these ideas is bound to be perfect for you.

1. Print Figurines

3D printing figurines of popular characters in various fictional universes is a great way for you to make money at home with your 3D printer. You could add slight customizations, make the limbs movable, add props, and make them as large as the person who ordered them wants them to be. Because of the complexity and the recognizable characters, you could charge quite a bit of money for these figurines if you choose to sell them.

However, depending on the fictional universe that the character figurine you are printing belongs to, there are certain laws and extra fees that you need to keep in mind before selling the figurines. Many companies, such as Disney and Warner Bros., require you to pay them when you sell something that is based on a character in a universe that they own. They can do this because of copyright and patent laws.

It may not be a big deal unless you are a major retailer, but you should still be aware of this danger. You don’t want to face a lawsuit because of an illegal Tweety Bird!

2. Print Busts

If you want to make money with your 3D printer at home, you can print custom busts. You could print ones that look like various famous characters, historical figures, custom busts based on photographs, pets, and more! You could make the busts in different sizes and various colors. If you make busts of characters, you can ensure that many small details are included, which means you can charge more money for the printing.

Before you make 3D printing of famous characters, make sure that you are allowed to sell custom items based on the various characters that you are planning on printing. Copyright laws may limit which characters you can sell images or replicas of.

3. Print Action Figures of Normal People

If you want to make money with your 3D printer at home, you can print action figures that look like normal people. Many people think that it would be cool to have an action figure that looks exactly like them and will definitely pay someone who can make it.

You could make it fully customizable as well. You could let people choose the colors of their costume, their name, their superpowers, how large the figure will be, and what their suit will look like.

You could also allow them to choose whether or not their costume has a cape, although many people will probably want their superhero costume to have a cape because they look cool. You could even allow them to include a pet next to them to aid them in their superhero adventures. Superhero action figures based on people are limitless, so you could make a lot of money selling custom action figures online.

4. Print Building Replicas

Many people have buildings that hold sentimental value to them and want to have a small replica in their home for them to look at every day. Others think that particular buildings look really cool and want to have a replica in their home. If you want to make money with your 3D printer at home, sell replicas of various buildings.

You could choose to only print out replicas of famous buildings like Notre Dame or the White House to make it easier for yourself, but you could also allow people to upload pictures of the building that they want a replica of. However, figuring out the design of the building may be slightly difficult with only a picture to base your design on, so you may want to show your clients what the replica of the building will look like before you start printing it.

Allowing your clients to see the product before it is printed may also make them more excited to get the actual product, which is almost always good for business.

5. Print Various Items for Companies

Many companies need or want items to be printed with a 3D printer, but do not have one on-site. So what do they do? They hire people to print the items they need and have the finished products sent to the company.

If you want to make money at home with your 3D printer, you could print various items that companies might need. You could charge by how large the item is, how complicated the design is, how long it will take to print, or any other factor. If you print things for hire, then you can work around your schedule and still make a lot of money.

An easy way to be available for companies to hire you to 3D print items is by creating a shop on Esty or another independent retailer website.

6. Print Game Pieces

Games are played around the world, but sometimes pieces get lost or broken. Unfortunately, many companies do not sell individual pieces to replace lost or broken pieces, so people then have an incomplete game that has become slightly harder to play.

If you want to make money with your 3D printer at home, you can make replacement pieces for a variety of games, or you could sell custom replacement game pieces. You could even charge people a little bit more money if they want the game pieces to be painted to look like the original game piece.

However, we would recommend offering this service only if you have a lot of experience with painting things professionally. You could get some bad reviews if the customer isn’t happy with your paint job!

7. Print Tools

If you want to make money with your 3D printer at home, you can also print tools. You can print any tools that you want to sell, and you can print them in any color that your client chooses. 3D printed tools do work, although they are slightly harder to use because they lack the weight that pure metal adds. However, they can still be used and are much easier to carry than traditional tools, so many people want to purchase 3D printed tools.

You don’t have to sell tools that are complicated to make. You could simply sell a variety of screwdrivers, hammers, pliers, and putty knives and have a pretty extensive inventory of 3D printed tools that work. However, you may have to add some sort of weight to the hammer so it can work properly when used.

8. Print Vases

Vases are very popular 3D printed items. If you want to work from home and make money with your 3D printer, make vases and sell them online. They don’t have to look like boring vases that you can find at any craft store. Instead, make the vases look clean and modern. Make the vases in a variety of colors and patterns, and make each pattern different from the rest.

Vases can be found in almost any household, and there are a lot of people who want to purchase vases from individuals rather than large companies. If you want to separate the vases that you create from the rest, allow them to be customizable.

9. Print Bowls and Cups

If you don’t want to 3D print vases, then print bowls and cups. Everyone uses bowls and cups, so there is a large audience that you can appeal to. Many people don’t want to pay a lot of money for cups and bowls that are made out of glass or stone and bowls made from a 3D printer appeal to people because they were made in a different way than usual, so your business will likely do well after people find out about it.

10. Print 3D Portraits

Many people want portraits of their friends or loved ones, but not everyone wants to hang a painted portrait on the wall. If you want to make money at home using your 3D printer, sell 3D printed portraits of people based on a photo that each client sends to you. However, before you actually print out the 3D portrait, you will want to send the client something that shows what the 3D portrait will look like, just so that they are not surprised or disappointed when it arrives at their house.

3D portraits are definitely talking points when they are seen in a home, and people want to have interesting things to talk about in their home, so you will have a large market to tap into if you choose to sell 3D portraits. You could even make 3D portraits of lost pets, which will definitely be appealing to pet parents.

11. Print Toys

Toys are always being bought, but many parents do not want to purchase toys from large companies that use many chemicals to make the toys that they sell. Instead, they want to purchase toys from independent retailers that tell you exactly what the toys that they are selling are made out of.

If you want to make money at home with your 3D printer, make a variety of toys. You can offer toys with moving parts, toys that work with batteries, or toys that really don’t do anything at all. You could even sell customizable toys where the client tells you what they want a toy to do and look like, and then you make it after they approve of the design. There are endless possibilities when you are making toys with a 3D printer.

12. Print Home Decor

If you want to make money without ever leaving your house with your 3D printer, you can print home decor. Many people who own homes want to have customized home decor in their house so that they can show it off to others, so they will pay a lot of money for a customizable home decoration piece, especially if they have never seen anything that is exactly like it in the past.

You could make anything that you want with a 3D printer when it comes to home decor. You could print out things to hang on the wall, coasters, picture frames, decor pieces that really don’t have a purpose, candleholders, or items that people specifically request. People want to support individual retailers and they want to decorate their homes in a way that suits them. Why not make home decorations with a 3D printer that other people think will look great in their home.

13. Print Keychains

Keychains are very easy to make with a 3D printer, so why not make and sell them while you are at home? Keychains are always popular, but your customers may want keychains that look unique and are customized to their preferences. If you have a 3D printer, then you can sell customized keychains out of your home and make a lot of money.

14. Custom Wedding Memorabilia

If you want to try something a bit more personal, you can also sell customized wedding memorabilia. Many people get married, and they want to give their guests a gift that will remind them of the day for years to come. However, many guests don’t have the ability to bring large gifts home, even if they want to keep the memento for various reasons.

You could make hearts or other keepsakes that have the couple’s names on them, a small replica of the happy couple on their wedding day, or simply allow the bride and groom to customize the gifts. You could even make a one-of-a-kind cake topper! There are endless possibilities when it comes to wedding memorabilia.

15. Film Your 3d Printer Printing Items

If you enjoy using your 3D printer but do not want to sell items online or in stores, then you can always film your 3D printer and post it online.

The videos that you create do not have to be very long, and you can post them on YouTube, TikTok, or Facebook and reach a very large audience. People are interested in this technology, so if you become a popular creator, you could make some money from tutorials, guides, and demonstrations.

Posted on Leave a comment

What Do You Need for 3d Printing? Set Up, Cost, and Maintenance

3D printing has been the latest craze and it’s definitely one of the coolest things that has come out of the last decade—there are so many things that you can make now that the technology has become available to the general public. Not only do manufacturers have great new opportunities with 3D printing but so does each individual who wants to give it a shot. Before you get started, there are some things that you need to have before you can design and print your creations.

3D printing requires a machine that can 3D print, the material that is needed to print it with, a design, and the software to help edit the designs. Each of these is essential to properly print and create things in 3D form. The average cost of a 3D printer is around $700.

The world of 3D printing is larger than you think and can be full of great opportunities and experiences if you really explore it. Immerse yourself in this great world and you will be surprised to find that it can be used as an amazing tool to fuel creativity, manufacture products for retail, and help you gain more knowledge.

Beginning and History

3D printing has been around for a lot longer than you might think. It has its roots dating back to 1986 when it was first created in Japan. This may not seem like 3D printing has been around for a long time, but that was 35 years ago. Most people have only started using 3D printers in earnest during the last 5 years or so when they became more publically available.

The 3D printing that we know today started as a way to make prototypes for designs that people wanted to test out. This original process was known as rapid prototyping. The official name for 3D printing is called stereolithography, or SLA.

A man by the name of Charles Hull has the U.S Patent for SLA and created the first SLA machine, or 3D printer. Many companies tried to take advantage of this technology and use it to make money. Of the many that started out, only 3 still exist: 3D Systems, EOS, and Stratasys. Charles Hull’s original company, DTM inc., was later acquired by 3D Systems.

Nowadays, 3D printers come in all shapes and sizes. There are ones that you can have at home or more complex printers that you can use in your technical careers. Regardless of their origins, the technology has progressed and will continue to be refined as the years pass.

Filament

The filament is the material that you use to print with. It’s usually some type of plastic, resin, metal, or a combination. There are many different types of filament that you can use to 3D print with and each of them has distinct pros and cons that creators must consider.

The first type of filament is PLA, or polylactic acid. When it comes to filaments, this is the most popular type of filament to use and there is a good reason too. PLA is super easy to print with. The temperature that the machine needs to print with PLA filament is much lower than all of the other types of filament. It also does not warp as easily. Something that is usually not considered when 3D printing is the smell. Sometimes filaments will give off a terrible odor when being printed, however, PLA is not one of these filaments. It tends to be odorless, and some people even say that it gives off a slightly sweet smell.

PLA filament is super useful when you’re trying to shake things up and experiment. It comes in a wide variety of colors and styles. If you want a bright pink filament, you will find it. You can find glow-in-the-dark PLA and even some materials that are infused with metal or wood. The problem with PLA is that it can be brittle, so you’ll want to avoid using it if you are going to make something that will get twisted or dropped, like phone cases or tools.

The next type of filament is ABS, or acrylonitrile butadiene styrene. This material can be a bit better than PLA in the right circumstances. It is a bit harder to print with but the end product can look very appealing when compared to PLA. Some common products made of ABS are lego bricks and bicycle helmets. Before getting ABS, you will need a high-temperature print nozzle to be able to start printing.

Things that are made with ABS tend to be high in durability and resist high temperatures. This makes ABS filament an ideal choice for making things that will be receiving lots of wear and tear, things like phone cases, toys, and electrical enclosures. A problem can show up when it comes time to print the material and the filament begins to cool down. As it cools down, it may begin to warp and give off fumes. ABS filament should only be used in places with great ventilation because of this problem.

The last filament will we talk about in-depth is polyethylene terephthalate glycol, or PETG. This material is commonly used in water bottles. This filament is a good middle ground between PLA and ABS because it is more durable and flexible than PLA and is easier to print than ABS.

When using PETG filament, you should be aware that it will absorb moisture from the air. This will make it harder to print with. If you keep it in a cool, dry place, you should be able to print with it and have no problems. If you are worried about getting scratches on it, this may not be the material for you, as it scratches somewhat easily and can lead to a less appealing product.

Other materials that you may consider using with your 3D printer are TPE and TPU. These are a more flexible and rubber-like material. They are made of nylon, which may be seen as a less conventional material, but more functional in its uses. It is also made of polycarbonate, an extremely strong material that is resistant to heat and physical impact. There is even metal filament that you can use, this requires a bit more planning and different attachments for your printer but can be done if you plan accordingly.

If you would like to learn more on 3d printing filament types and how they are used. I have written a whole another article on that that you can check out here: 33 Types of 3D Printing Filament and How to Use Them.

Cost

There are lots of 3D printing machines out there that any number of consumers can use. Prices for a high-quality 3D printer have been dropping since late 2014. The price of a 3D printer will vary depending on what type of 3D printer you want. An entry-level 3D printer can be as cheap as $200, while the high-end industrial 3D printers can be well over $100,000. It all depends on what you want out of your 3D printer because you get what you pay for.

Entry-level 3D printers are going to be a great choice for you if you are just getting into 3D printing. They are a great way to learn about the hobby before you make a real investment. Most entry-level machines will be restrictive in their sizes and will not be able to print over 3-4 inches in any dimension. These machines usually cost between $200 and $400.

Hobbyist machines are for people who already have some experience with 3D printing and are ready to scratch the itch of a bigger and better machine. These machines are faster and will allow you to print bigger items. There is also a much larger choice of material that you can use for filament with these machines. The software behind these machines is a bit better than the basic machines as well. One of these will cost you anywhere between $300 to $1,500.

Enthusiast machines are the next step up. They allow you to print larger items, up to 12 inches in length. These machines are usually a bit quieter than other machines and can use a lot more types of filament than the other less expensive machines. If you are thinking about using one of these printers for steady production purposes, you may want to rethink that. These are capable of printing high-quality items and can take some wear and tear, but they should not be used continually. One of these machines will cost you from $1,500 to $3,000.

Professional machines, because of their improved design and larger size, are much stronger and more resilient. They can deal with more stress than other machines. With professional 3D printers, you can start mass-producing items and will not have to worry about your machine breaking on you. These machines can make a variety of items that can be as large as 12 inches in all dimensions and can be made of all sorts of materials. The quality of these machines is still very high, and you will see a vast difference, even compared to the enthusiast machines. These machines cost $3,500 to $6,000.

The last type of 3D printer is an industrial machine. When it comes to these guys, the world is your oyster. These machines are highly durable and are built with metal to ensure a quality machine. They are not DIY machines and will have extra maintenance fees included along with them. The filament that you need for these huge machines will probably cost you a lot more than for the other machines. These 3D printers cost around $20,000 to $100,000.

Type of PrinterCost
Entry-Level 3D Printers$200 – $400
Hobbyist 3D Printers$300 – $1500
Enthusiast 3D Printers$1500 – $3500
Professional / Performance 3D Printers$3500 – $6000
Industrial 3D Printers$20,000 – $100,000

I also have a 3d printing filament cost breakdown table by type of material in the middle of another article. You can check it out here: Beginner Guide to 3D Printing | All Questions Answered

Design

The most crucial part of 3D printing is the design that you are going to be printing. You can come up with your own, or if you do not have any ideas, you can get inspiration from one of the numerous 3D printing communities that exist on the internet. Places like Thingiverse or Tinkercad are great for inspiration and designs. These robust communities are full of people willing to help. If you are interested in creating your own designs and have a mind full of ambitious ideas, you could also consider making your own 3D models through any number of great programs.

One of the most basic 3D modeling programs is a browser-based app called Tinkercad. It was designed with the intent of helping people learn about how to make 3D models. It has many tutorials that guide users to have a top-notch design. Even if you do not have a 3D printer, it has a print and ship service that allows you to create something, have it printed, and get sent right to your door. Tinkercad is a great way of learning about 3D modeling.

Blender is the next program in our lineup. It is completely free to use and is intended more for people who already have a bit of experience with rendering 3D models. It has a steep learning curve, but do not be discouraged. There are many tutorials out there for Blender. If you have the desire, you can learn it in no time. A cool part about Blender is that it was created as a software for artists and can help you render your designs in a photorealistic way.

Another really great program is DesignSpark Mechanical. It comes with an entire library of 3D models to help you get a jump start on your creative processes. It also allows you to mix a pre-created model from the library with your own drawings and creations. It gives you a start but lets you be in charge once you get the hang of it. The software runs quickly and effectively to help get your design done smoothly and quickly. It is also incredibly beginner-friendly and is great for people who have just started to learn about 3D printing.

In the end, there are a variety of printers, filaments, and design software you can use to get started designing and creating your own products. 3D printing reaches into a whole new world of creation and getting started is exciting.

Posted on Leave a comment

What Happens if 3D Printing Filament Gets Wet? | PLA, ABS, PETG, Nylon, Wood

Using a 3D printer is expensive, so keeping all of your equipment clean and dry is very important. Filaments like PLA, ABS, PETG, Nylon, and Wood need to be treated with care and stored well to prevent them from getting wet.

When 3D printing filament gets wet, the printing process and the final result get messed up. When the filament comes out of the tip, there can be inconsistencies like bubbling and stringiness. These are indications that the filament is too wet, and the filament needs to be dried before being used.

If 3D printing filament is wet, then all you need to do is find a drying method that works for your type of filament and dry it. Then, you just have to remember to properly store your filament so that it doesn’t get wet again.

How to Know if Filament Is Wet?

To test if the filament is wet, run the machine and look at the nozzle where the filament comes out. If you see it has bubbles and pockets of air in it, then it is wet and won’t perform well. If you don’t see that, you can also turn off the machine after it has warmed up and see if the filament stops coming out, or if strings are oozing out of the nozzle. If you see the thin strands of string, then the filament is wet.

If you do not see any of those issues after trying those tests, then your filament is not wet and should perform well. If it still doesn’t perform well, then there is a very small amount of moisture in the filament and you can decide whether you want to store it better or dry it out.

Drying filament takes about 4-6 hours, but if your filament has only a small amount of moisture, then you might want to try 1-2 hours at first. That way you do not over-dry the filament. Overdrying your filament can cause the plastic to become brittle and it won’t stick to itself well. So, be sure to exercise caution when drying your filament.

When drying out filament, some methods work well, but always use caution. Having wet filament is bad, but having filament that is too dry is bad too. You don’t want the plastic to become brittle, and we want to avoid stringiness. Heat could also melt or warp some types of filament, so be aware of that.

Why Does Filament Get Wet?

Filament gets wet because of the way the plastic is formed. The structure of the molecules and the materials used in filament attract the moisture out of the air and can cause the plastic to underperform.

If your filament is wet, it can also be bad for your 3D printer. It can get jammed with melted filament plastic, and it will give you bad products.

Some people never have wet filament, and others always worry about their filament getting wet. This is because of location. Some places have more humidity and moisture in the air than others. So, depending on the weather in your location, you may or may not need to be more careful about how you store your filament.

Wet filament makes 3D printing a mess. The plastic comes out with air bubbles and can mess up the straight and clean lines that 3D printing makes. It can also cause the 3D printer to have strings. If you have used a hot glue gun, then you should know how it looks after you lay out the glue and pull the gun away, forming a string. When you pull away from the gun, the string gets longer and thinner. This can happen to filament as well when it is wet.

Making sure your filament is properly stored is the best way to prevent moisture from ruining your filament. But if your spool does get wet and doesn’t work properly, then there are some methods you can use to dry it out again. That way, you can keep using your spool of filament and you don’t have to buy a new one.

How to Dry Filament

To dry filament, look at the different processes that work for the type of filament you have. Decide on a method you can perform on your filament type and follow the instructions. Be sure to read the directions or watch a video before performing any drying process on your filament so that you know what you should be doing. Plus, this way you can avoid mistakes.

When drying filament, just be careful that your temperatures are not too high. The charts listed below give you the right temperatures for drying different filaments. When the temperature is too high, it will melt the strands of filament together, which can ruin it.

Different filaments draw different levels of moisture out of the air, which makes some filaments wetter than others. Similarly, some filaments can dry faster than others. So, when you dry your filament, be sure you check up on it to ensure that it doesn’t get ruined.

The methods below are the most commonly used, and they offer great results. You can dry your filament at home, or you can buy a filament dryer. No matter the method, they all are proven to work, and there are numerous videos online of people testing them. So, before you try a method out, read below and maybe watch a video so that you are prepared and know what to do.

Oven Method

gray gas range oven in kitchen
Photo by PhotoMIX Company on Pexels.com
PLA104-112 degrees Fahrenheit
ABS176 degrees Fahrenheit
PETG160-180 degrees Fahrenheit
Nylon176 degrees Fahrenheit
Wood95-160 degrees Fahrenheit
Oven Temperature for Filament

The oven method works for drying PLA, ABS, PETG, Wood, and Nylon. You simply heat the oven to the directed temperature and let it dry for 4-6 hours.

Be sure to heat your oven fully before putting in the filament. Placing the plastic in too early can melt the strands together. Also, to make sure you aren’t going to melt the plastic, you can leave the end of the strand pointing up, and if it falls then it is too hot in the oven.

You can dry the filament in sessions too. If keeping your oven on for too long is hard to do, you can dry the plastic in 1-hour increments until you reach a total of 4-6 hours. For some people, this works better with their schedule.

Filament Dryer Method

A filament dryer is a product that is specifically made for drying out filament. This method should have a setting for drying any type of filament. But, before you buy, double-check that it is compatible with the type of filament you have.

If you want to purchase this tool, you can look at the place you got your 3D printer and look for a filament dryer. This is not necessary, but people like it because they can trust it and it is always on hand.

To use it, all you have to do is follow the setup instructions that come with the product. Then use the instructions to turn on the machine and set up your spool of filament in it. All you have to do after following setup instructions is to let the machine work. It is super easy, so if you have the budget for it, you might consider getting yourself a filament dryer.

People tend to go for this option last. If there are cheaper at-home ways to dry filament, then people tend to try those first. But some people do not trust themselves or their at-home equipment to do the job right, so buying the filament dryer is no problem. Depending on you and your likings, you can choose whether to go for this product or not.

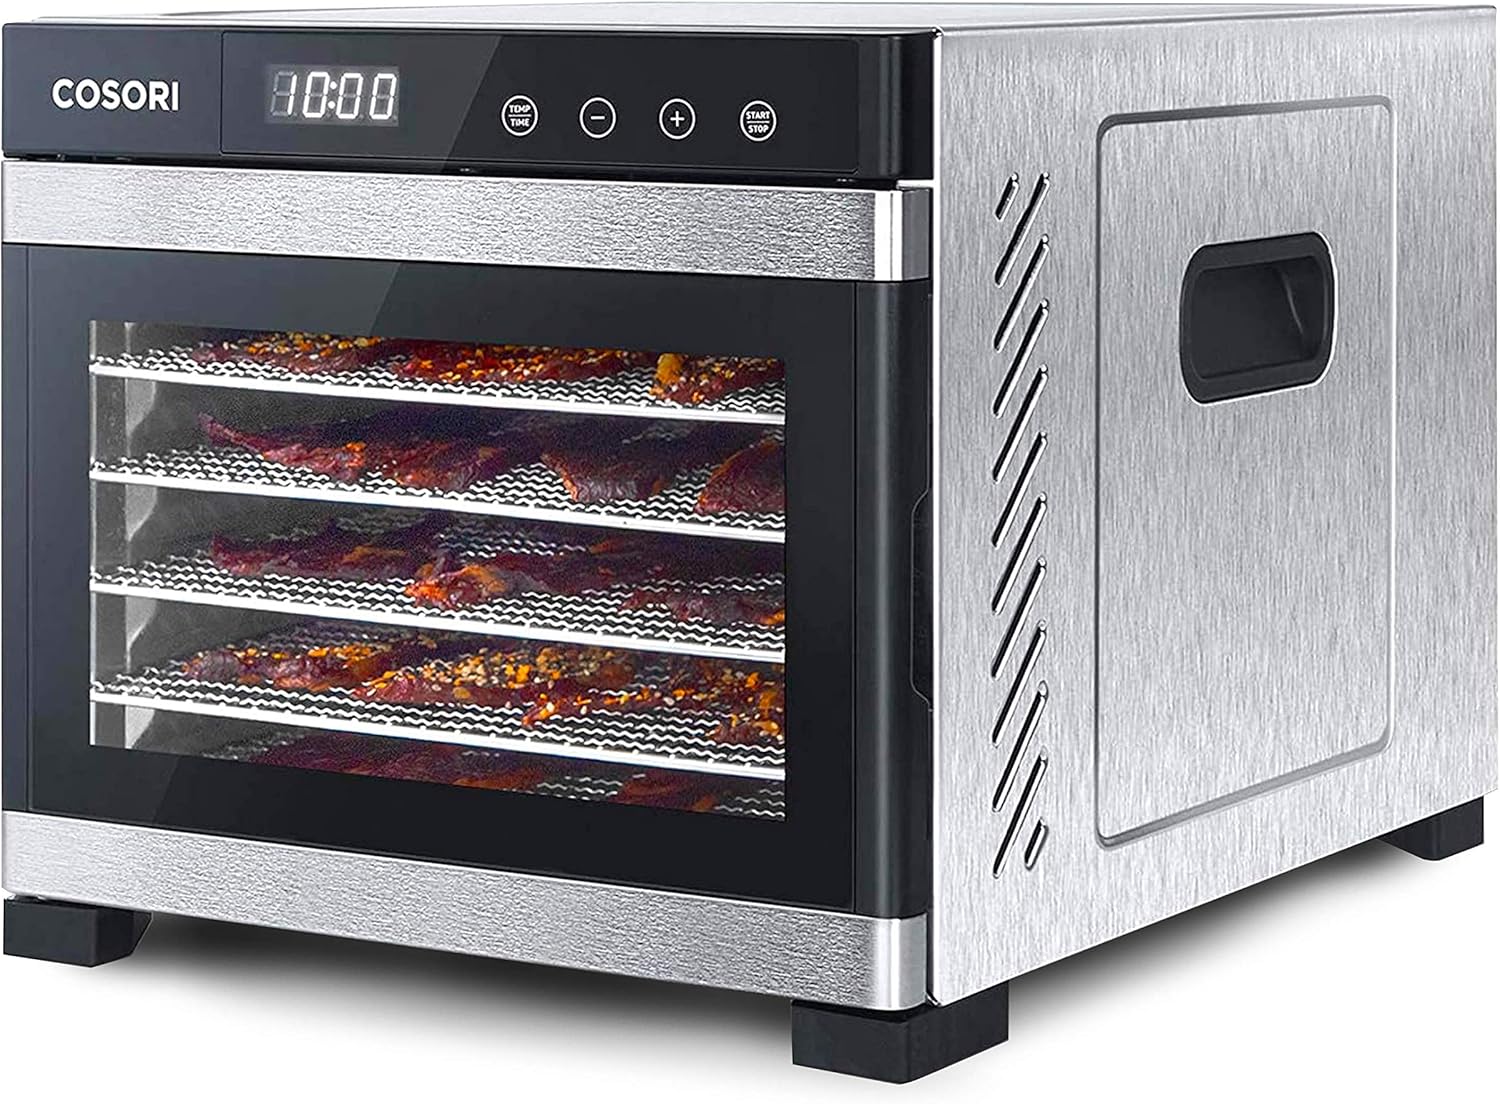
Food Dehydrator Method

If you have a food dehydrator at home, this method is easy to use. You can also use this method for any type of filaments such as PLA, ABS, PETG, Nylon, and Wood. Dehydrators operate at lower heating temperatures to slowly dry out food like fruits. But, you can use it to dry out your filament as well.

PLA104-112 degrees Fahrenheit
ABS176 degrees Fahrenheit
PETG160-180 degrees Fahrenheit
Nylon176 degrees Fahrenheit
Wood95-160 degrees Fahrenheit
Food Dehydrator Temperature for Filament

For this method, make sure you can fit your filament spool in the dehydrator. Then, preheat your dehydrator to the desired temperature according to the chart on the right. Once the dehydrator is fully heated, you can place your spool of filament in. Let the machine run for 4-6 hours, and to be safe, check on the filament every hour.

Checking on the filament hourly can help you see the progress and you will be able to spot if the filament is melting together or not. Because it can’t use high temperatures, the dehydrator shouldn’t be able to melt the filament.

If you notice that any of these drying methods start to melt your filament, then pull out the spool. After you have taken out the filament, you can try the method over again, but be sure to make adjustments to the process you used. If you used your oven, chances are that the oven did not keep the heat at the right temperature. So, make your adjustments or try a new method.

How to Prevent Filament from Getting Wet?

Filament gets wet depending on the air in different locations. If you live in a humid place, or if it gets humid over the summer, then you have to cover your filament. If you live in a dry place, you should cover your filament, but leaving it out on a table for a while shouldn’t harm it.

You should take into account where you live, and see how it affects your filament. Depending on how wet the air is where you live, you may need stronger containers instead of simply using a plastic bag.

If you have never noticed a problem with your filament, then keeping it in a plastic bag or plastic storage bin should work fine for you. That way you can keep all moisture out, keep all your spools in the same spot, and make sure that your workspace stays organized and clean.

Filament needs a dry place to protect it against moisture. So, at least having a plastic storage bin or a plastic sealable bag for it is a good place to start. But more importantly, the place where you store the filament should be where there is little moisture. For example, a bathroom, kitchen, or laundry room would not be good for storing filament. Instead, try using a storage closet or place close to where your 3D printer is. That way it is away from moisture and it is close to the 3D printer.

If you have a craft room, that would be an amazing place for storing filament. Just be sure to keep items like room humidifiers away from where your filament is so that you can keep it dry. As long as your filament is covered and stored away from potential moisture, then it should be fine. Over time the filament can draw moisture out of the air, but it shouldn’t harm the way the plastic comes out of the 3D printer.

If you need a stronger barrier to protect your filament against moisture, then you can consider other methods for storing it. Some airtight containers and bags can suck the air out of the container you have for the filament. Depending on how humid your area is, you may or may not need a secure airtight place to keep your filament.

The main tip you can use to prevent your filament from absorbing moisture from the air is to always put it away after using it. Keeping the spool out in the open is what causes the plastic to take in moisture. So, if you at least put your filament away in a simple plastic bag or container, then you will be protecting it and making sure it lasts a long time.

Posted on Leave a comment

Does 3D Filament Go Bad? | Shelf Life of Filament

3D filament is expensive, and when we buy it, we tend to hope it will last us a long time. But, as with many things, this simply might not be the case.

3D printing filaments will go bad, especially if they are exposed to humidity. They can last anywhere from two months to two years depending on the ambient humidity. The best way to prevent filaments from going bad is to store them in an airtight sealed container with a desiccant or silica.

So, what do you do with all of those filaments you have lying around on your desk, and how do you protect them from water damage? Also, what is it that makes filaments vulnerable to humidity in the first place, and are the things you make with them vulnerable as well? We’ll cover all of this and more below!

The Life of a Filament

Many filaments have a structure that tends to absorb water when put in contact with it. Even if they absorb even a tiny bit at a time, that will add up to cause not only a slight swelling in the filament itself (which can damage its nozzle) but also some structural damage that can cause the builds that use the damaged filament to become brittle or lose strength. This property of being absorbent is known as being hygroscopic.

Several different kinds of filament are commonly used in the United States. Most of these can go bad when exposed to humidity. Here is a list (that is by no means comprehensive) of the different ways that a filament can go bad.

PLA

The only way to tell that PLA has been damaged is to start printing with it. If it damages the nozzle of your printer, creates a print with dark splotches on it, or makes a weak product, it might be expired. Water-damaged filaments can create bubbles, air pockets, and stringy buildup, none of which are ideal for 3D printing.

You can prevent your PLA from going bad by storing it in a cool, dry place or an airtight container with a desiccant or silica. This will prevent your filament from coming into contact with water entirely, making it less likely to sustain any kind of water damage.

A PLA filament can spend about two months in a hot humid spot or two years in a cool dark one before it goes bad.

PETG

PETG is similar to PLA, but it’s designed to be less sensitive to water. Because of this, it can survive for around a year before receiving any sort of damage from it. It will still end up getting destroyed by humidity, however, and so correct storage is very important if you plan to keep the filament for longer than that.

ABS

ABS is another fairly common kind of filament that can easily expire. Unlike PLA however, you might be able to discover that an ABS filament has gone bad because the color has faded. Exposure to moisture causes it to develop hairline fractures which can cause the products to be vulnerable to mold or bacteria, which will smell bad and potentially cause structural damage.

That being said, ABS can last for over a decade with the proper storage, especially if you dry it out before using it. Just watch out for discoloration and bad odors.

PVA

PVA is actually soluble in water, which means that humidity can destroy it beyond repair. PVA needs to be stored in a place where water can’t get to it, or else it will go bad quite quickly. Other filament types can usually be dried, but water is a death sentence for PVA.

Nylon, Polycarbonate, and Copolyester

All of these filaments are so hygroscopic that just two days in humid weather is enough for them to be completely ruined. These filaments all need to be treated with extreme care if they are to be used. Proper storage and care will prevent them from receiving moisture damage and will remove the need for them to be dried out before they can be used.

Most filaments are both hygroscopic and biodegradable, which means that they can in fact go bad when they have too much moisture. They can even break down over time if you leave them out for too long.

But if filaments can degrade, then what about the things we make with them?

Can 3D Printed Objects Go Bad?

Focusing on PLA, the answer is technically yes. Because PLA is made from biodegradable materials, it will break down over time and eventually decompose.

When stored at room temperature in a relatively dry place, it will take 15 years for the object to show any signs of decay. In fact, unless it’s left out in the sun, dunked underwater, or buried deep underground, it’s very unlikely to start breaking down before that time. It takes such a long time to decay that there’s really no need to worry about it.

The only exceptions would come if you choose to bury your print in the dirt and heat it up to about 140˚ Fahrenheit (60˚ Celsius) at which point it will start to degrade extremely quickly, showing signs of cracking and tearing after only six months.

Of course, there’s no way that anyone would do that on accident, so you won’t need to worry about PLA projects wearing down when they are used for regular circumstances.

While sunlight won’t make the object decay much faster, it will cause it to lose some of its color, especially if you’ve applied paint to it. However, this can easily be fixed with a quick touch-up to the paint job, and it won’t damage the structural integrity of the object.

That being said, the warmth from the sunlight can speed up the process of decay, so if you like playing with your 3D printed projects outside, you might want to keep that in mind.

Most 3D printing filaments are biodegradable, although the time that each one takes to break down might be quite different. Some will last longer than others.

But fifteen years is a long enough time that you’ll probably be able to replace the object long before it ever starts to be a problem. Given proper maintenance and care, you can probably keep them for even longer than that. As long as they’re in a relatively cool, dry place, they’ll be fine.

As a sidenote, PLA is actually recyclable under the right circumstances. Of course, you’ll need to clean any dirt and grime off of the print thoroughly and make sure that it’s made of 100% PLA. You can even recycle it at home to use for your next project if you really want to! You’ll need a specialized recycle extruder for your printer, but otherwise, you can do it yourself with only the printer and a shredder to break the print down into tiny parts.

Use the shredder to shred the print into 0.7 cm strips. Then, set up the recycled filament on your printer. You can now load the printer with the strips, which will come out as a filament thread. You may have a way to spool this thread up, but if not, you’ll just want to make sure that it coils itself as it hits the ground.

You can do this by pushing the new filament to one side as it hits the ground. This should help it coil pretty nicely if you do it right.

When you have it coiling the way you want it to, you can start fine-tuning to get the process. You’ll be recycling old PLA in no time, and that should save you quite a bit of money.

Can You Restore Bad Filaments?

Most filaments will end up going bad because they’ve taken on a large amount of water. This is actually a solvable problem much of the time. All you have to do is dry out the filament and it should be usable again. But how do you do that?

The best way to dry your filaments is with a filament dryer. Filament dryers are easy to use and reliable, as they have specific settings for each of the different filaments that you might need to dry. All you need to do is put the spool of filament into the dryer, pick the appropriate setting, and wait for it to dry!

The next best choice is a food dehydrator. Food dehydrators just happen to do the exact thing that we’re trying to do here, which is getting all of the water out of something that is wet. For PLA, run the dehydrator at 45˚ Celsius (112˚ Fahrenheit). For ABS, you’d want it to be much hotter, around 80˚ Celsius, or 176˚ Fahrenheit.

Finally, you could use an oven to dry out the old filaments, but ovens are rather unreliable at these sorts of things as they often aren’t exactly the temperature they say they’ll be. If the oven isn’t hot enough, then the filament won’t get dry. If it’s too hot, the filament can be permanently damaged. That makes ovens a fairly risky choice for filament restoration.

You can also sometimes dry out a filament by applying desiccators, but will only work if 1) the desiccator is already dryer than the filament and 2) you use a lot of desiccators.

Desiccators work by being so dry and so absorbant that water flows into them, but it turns out that if there’s enough water in an object, it will actually attract water better than the desiccator will!

Because of this, and the fact that even the strongest desiccator can only absorb up to 20% of their mass in water, desiccators are usually not especially feasible for use in drying out waterlogged filaments. They’re great preventative measures though, and it’s a good idea to store your filament with some desiccators nearby.

How to Prevent Damage

Of course, it’s usually better to prevent damage from occurring than it is to fix it after it’s already happened. If you don’t have the proper equipment, restoring wet filaments can be a tricky process that’s more trouble than it’s worth. So how do you prevent the need for drying entirely?

The answer is simple: store your filaments in a dry place. No matter what kind of filament you’re using, you can never be too careful about its storage location.

The first step is to find the coolest, dryest part of your home. This might be a basement if you live in a place where there are basements, or it could be a closet or a pantry that doesn’t have any windows and will never see the light of day.

Now that you’ve found your ideal location, you’ll want to move all your filaments there. But they aren’t safe quite yet! Your next step is to find either airtight bags or containers to sequester them away in. Some filaments come in airtight storage bags. If these are reusable, then great! You can keep your filaments in their original bag as long as you still have a silica packet to go with it.

You can also use storage bags as long as you have desiccants and humidity meters to go with them. These are fairly durable, and the desiccants can suck up any excess humidity. All you’ll need to watch out for is dust!

You can even use vacuum bags if you have them. These are great because they prevent any water from getting into the bag and damaging the filament. There can’t be any humidity if there isn’t any air.

Airtight storage boxes can also work well for keeping out the damp if used correctly. They can have quite a high storage capacity, meaning that you don’t have to store all of your filaments separately, which can be nice. You do need to make sure that the container has a sufficient amount of desiccant inside it, however. Even if new air won’t enter the box, there is still air inside the box.

Finally, you could buy a filament storage box. These are actually designed to store filaments, which makes them a perfect choice. Because they’re climate-controlled and perfectly dry inside, your filaments should last for their full shelf life when they’re kept inside.

However, these containers can be kind of pricey, and it might be cheaper to use more DIY methods. It’s up to you, as long as the filaments are stored safely.

Posted on Leave a comment

What Are the Disadvantages of 3D Printing? | Pros and Cons

3D printing has become an incredibly popular way to manufacture goods. While it doesn’t seem as though it has been around for long, it is about 40 years old. As it has molded the past, it will continue to shape our future.

3D printing comes with advantages and disadvantages. 3D printing can’t be done with a variety of materials, cannot be used to make large quantities, and may lead to a reduction of jobs. Although, 3D printing allows a designer much more freedom and takes far less time, and is more eco-friendly.

Together with both the pros and the cons, 3D printing is still used widely and will continue to grow in use as technology progresses. It is important when you first start 3D printing to understand the risks as well as what good it can do for your business or your life. Depending on your circumstances and the circumstances of the world, you may very well see the pros and cons differently from time to time.

3D Printing Benefits and Drawbacks

The earliest 3D Printing was done in the 1980s, but it has progressed a lot and expanded in each reach since then. Nowadays we have the capacity to build 3D houses and even print in space. So, what are the great parts of 3D printing, and what are some not-so-great parts?

ProsCons
Less Waste Limited Materials
New ShapesSize Restrictions
Fast & Effective Copyright Issues
Light Parts Large Scale Slowness
Quick ProcessPost Processing Work Load
Portable Reduced Employment
Freedom of DesignCost
Accessible Part Structure

Let’s take a closer look at each of these pros and cons so that we can see if 3D printing suits our needs and the needs of others. Each of these will help you determine which source of manufacturing is best for you! It will also just give you a small glimpse into what 3D printing looks like and how it has begun to function in our society not only as a way of manufacturing products for sale but also as a hobby and at-home machine that helps individuals and companies bring their dreams to life!

Pros

As we see from the table above, there are a variety of really great outcomes that 3D printing has to offer. Today it has become cutting-edge technology that has helped to manufacture things that were impossible to do before. Consider these advantages and disadvantages to decide if 3D printing is right for you. There are a variety of options out there if 3D printing does not work best for you.

  • Less Waste – In other forms of manufacturing, they will have a large piece of material and cut out the shape of what they want to create, leaving all the excess as waste that most of the time can not be recycled. 3D printing does not take away from the material but is an additive process, meaning that things are added to create the shape, and only minimal shaving off and sanding is required. Plus, the material that is used is normally recyclable and is often made of recycled material itself. This makes this process better for the designer, but also for the environment.
  • More Shapes – All of a sudden we can create things that we could not create before! We can now make more intricate designs and use more complex shapes because of 3D printing. 3D printing frees up quite a few things to ensure we are able to create anything we desire.
  • Fast & Effective – For simple, basic, or even slightly more detailed items, 3D printing an object can be done in a matter of a few hours. This is much faster than other manufacturing techniques, such as molds or machined parts. It is quite fast for the quality product it creates. In addition to this, you can also print on demand with 3D printers, rather than buying your manufactured product in bulk and keeping up a huge supply for a year while it sits in a warehouse and gets dusty. Instead, you can print stuff right when you need it. This way it saves you time, money, storage fees, and heartache from lost products. It is fast not only in its creation, but also in its ability to make this more smooth and quick in retail.
  • Lighter Parts – Another really great advantage of 3D printing is that you can create parts for cars and other similar things that are much lighter than the metal parts we use now. This adds to fuel efficiency and helps to create a way for us to move forward. While it is plastic and lightweight, it still remains strong and capable. In the creation process, elements can be added to make a part heat resistant, have greater strength, or even repel water.
  • Quick Process – Because putting your design in the 3D printer is only part of the process, it becomes easier to be creating one design while another is in a different stage, and therefore it allows more freedom in the use of your time. Once a machine has started working on a design, it can be run by a single person, and that one person can be running multiple machines at once so that things are happening quickly and effectively.
  • Portable – Have you ever wanted to make something away from home? Or away from work? 3D printing makes this possible. Each 3D printer is different in size and shape, and while there are larger printers that can be used on an industrial level, there are also small, portable ones that you can take with you anywhere you go. This allows you the freedom of creating and printing things where ever you may be.
  • Freedom of Design – Things, that before were not possible, have become possible with 3D printing. You can now create extremely complex geometric designs with just the push of a button. Normally, items like this cannot be made, and so 3D printing has opened up a new door for creators and inventors to create things that before would have been impossible to make.
  • Accessible – Because this is a fairly new industry, and because it has become so popular, it has also become very accessible. If you need something 3D printed and you don’t have a printer yourself, many places will make it for you. It also is something that is around in most places locally, meaning that outsources the creation of products to another country may be more expensive than to just create them where you are and not worry about shipping them overseas.

Cons

While all these advantages are good, we must keep in mind that this is still a fairly new industry. It has been around for 40 years, but it has made most of its progress only recently. It allows you to do great things, but may also lead to small problems in the economy and in the manufacture of items that a person plans to sell or use. Carefully review each and see which will be most detrimental to your situation.

  • Limited Materials – Thus far, only a limited amount of materials have been able to be used. They used a limited selection of plastics and very limited types of metal. The materials must be able to be temperature controlled well so that they can be used, and there are not many materials that fit the criteria needed to ensure a well-working item.
  • Size Restrictions – The chamber within a 3D printer where the creation actually happens is actually relativity small. There is not enough room in there to create something that is larger in size. Even larger printers that are industrial grade do not have enough space for some items, meaning that larger items still must be made using another form of manufacturing, like injection molds. This might change in the future, but for now, 3D prints are small.
  • Copyright Issues – Just as with any new technology or creation, after it has been around for a few years, there begins to be problems with legal issues. It is important that each product created through 3D printing is not copyrighted. It could pose a serious problem if people began to create fake products and advertise them as the real thing, not only taking revenue from the actual product and company, but also overlooking important safety features and rules.
  • Large Scale Speed – While we talked about speed as an advantage, it is also a disadvantage. While 3D printing has made things be able to take place more quickly, it is still not fast enough to create large quantities of any one thing, and after you get to a certain point, it is more cost-effective and timely to use another form of manufacturing that can keep up with a large quantity demand. And yes, most prints only take a few hours, but that’s only one print, and if you are making a lot of an item, then those hours add up really fast.
  • Post Processing – After the item is created, it isn’t the end. Prints don’t necessarily come out as a finished product as you might have hoped, and most of the time 3D printing is used to create parts that must later be assembled and finished. It also means that you may have to sand and add other details that were impossible for the machine to add.
  • Reduced Employment – A lot of new technological advances mess with the economy and working-class people. 3D printing is not exempt from this. The more we are able to use this technology, the fewer people will be needed to manufacture products. A group of 30 people can be replaced by one person to run 30 machines. This is not helpful to the economy and the working class.
  • Cost – A 3D printing machine is actually pretty pricey when compared to other manufacturing machines. They cost anywhere from $10,000 to $100,000. It is a considerable investment that may take some time to pay off. Plus each is manufactured to the needs of the buyer, so it is important to understand that it may take weeks to actually get the product once you have bought it. Materials also have a large price tag, and so the creation of things adds to the cost each time you want to use them.
  • Part Structure – Another problem may be that parts which are created with 3D printers are strong, but sometimes not strong enough to pass strength tests. This will all depend on what you are creating and what you are using it for. Only for certain products will strength tests be required or relevant.

“Additive manufacturing allows parts to get printed in layers that adhere to each other during the creation process. That means these items can sometimes separate or break under certain stress levels or with part orientation.”

source

3D printing has opened a whole new world of opportunities and experiences. It is really still only in the beginning stages and is sure to continue to progress and be refined as time goes on. Through a careful analysis of its pros and cons, we can find out that 3D printing may not be the best manufacturing for all things, but for some, it is the best option! It all depends on what is being created and what components it needs to function. It is also important to consider the cost to create things; in some instances, 3D printing will be the cheapest option, while at other times it will be different than what you would expect. It is a new technology and we must learn to progress with it!

As we see, there are a whole plethora of advantages and disadvantages. We have chosen to show you both sides so that you may see what could potentially go wrong if you were to enter into that system of manufacturing. It is phenomenal technology that will continue to enhance life at a creation level, but as with all things, it will always have its downsides that we will have to work through. It is just a matter of deciding which is more important to you, and how you can make it work as you create and print.

Posted on 1 Comment

10 Things To Know Before Starting 3D Printing | Tips for Beginner

  1. Cost of 3D printing
  2. Is 3d printing difficult for beginner
  3. Print on glass… or any good bed
  4. Bed leveling & The perfect first layer
  5. Materials matter
  6. Slicing Matters
  7. Print profiles
  8. Rafts, Brims & Skirts
  9. Understanding support
  10. Keep an eye on things

3D Printing is a rapidly growing industry that attracts many enthusiasts and with 3d printers becoming more affordable today than ever before. More and more people are getting into this new 3d printing adventure but many beginners do not realize what it actually takes to get into and then continue the new hobby.  

Unlike the  “printing” that we use to print paper, 3d printing is much more involved and requires more than just a click of a “Print” button.  I want to share with you my experience of what I wish I knew before I got started in 3D printing.  

#1.  Cost of 3D Printing

As for everyone about everything, cost plays a great role when making decisions to make a new purchase and with 3D printers buying more expensive 3d printer does not necessarily mean buying a better 3d printer. We talk more about this in another post that you can check out HERE.  

How much does a 3d printer cost?

3d printers’ typical price range for a beginner is starting at under $200 – $1000 for an average desktop 3d printer that is very much capable.  Most beginners start out with a budget friendly Creality brand at around $200. 3D printers price can run up to over several thousand or even tens of thousands of dollars for more industrial 3d printers.

Different Types of 3D Printers

There are different types of 3d printers that need to be taken into consideration.  The most popular among beginners of 3d printing is the FDM plastic printers. Then there are also resin SLA printers and metal 3d printers are starting to show on market.  More details on different types of 3d printers can be found HERE.

After you have found the 3d printer of your choice and made a decision on the purchase. Keep in mind that the cost of the printer is not the only expense you are gonna make to keep on printing.  You may have spent around $200 on a budget 3d printer but after setting it up you will be ready to start printing and for that you will need printing material.

Cost of Filament for FDM 3D Printers

Filament is a hidden cost of 3d printing that many beginners are unaware of. There are many filament material types as well as brands and each one carries its own price tag.  Price on filament varies from cheap PLA 1 Kg from under $10 to more expensive PETG of over $100. The Vast majority of filament fall right around $25 a spool of 1Kg. 

3D Printer Upgrades

After setting up and tinkering with a new 3d printer you will get more comfortable using it and have a better understanding of how things work. You would want to put more life and personality to your 3d printer leading a way for 3d printer upgrades.  

Opportunities are endless when looking to upgrade and personalize your 3d printer. It can go anywhere from downloading from online sources and  3d printing fixtures for your printer to upgrading internal electronic components and software and it all comes at cost. More often than not the cost associated with these upgrades are overlooked.  

#2. Is 3D Printing Difficult for Beginner

Short answer is YES. While most 3d printers come ready to print within minutes of setting up with no experience in 3d printing needed. 3D printing can be difficult even if you are not a beginner.  But don’t let it stop you from getting into an exciting journey of 3d printing.  Thankfully, we have internet and with the popularity of 3d printers there are many groups and communities with many talented like minded people who are willing to help you along the way.  

Things to consider before getting started with 3d printing.

  • Be aware of different software 
    • CAD Modeling software if you want to make your own models or manipulate models that can be downloaded from free online sites like most popular Thingiverse, GrabCAD, Thangs and many more.
  • Different types of slicing software
    • 3D printer Slicer software is what converts the 3d model into a gcode that 3d printers can recognize and execute by following commands of that gcode.
    • There are both free and paid versions of slicer software you can download. With Cura being the most popular and free slicer among 3d printer users.
  • Different types of filament behave differently when printed
    • This will require adjusting settings in slicer which can later be saved as a profile under a specific name for future use. This file type is known as fff and while the profiles are slicer specific the setting on many of them are the same. Check out our library tab above for free profiles and 3d models.
  • Not every 3d print will turn out perfect. Some tuning may need to be done along the way.
  • Be aware that 3d printing is a slow process and takes a lot of time but as technology evolves 3d printers are becoming much better in quality, more user friendly, and of course faster.

#3. 3D Printing Surface Matters

Every 3d printer comes with a printing surface but not all 3d printing surfaces are the same and the quality of 3d printed models can be drastically improved by having the right type of 3d printing surface.  

There are many 3d printing surfaces available but here we will cover only a few.  

  • Magnetic flexible 3d printing surface
  • Glass or mirror

Most 3d printers today come with either one of the above described printing surfaces and there are benefits in each.  

Magnetic flexible 3d printing surface is great as it is fairly cheap and is easy to remove part from when they are done printing.  Also, there are no worries about securing the printing surface to the build plate as it is magnetic.  To remove models simply remove the magnetic flexible surface with a 3d printed model still on it.  Then bend the printing surface and peel off the model.  The downside however is that the 3d printed models come off too easy and sometimes do not stick to the surface and corners lift up or model warps. More information on that can be found on our other post Here

Another thing to watch out for is the flexible magnetic sheet is not very durable and can get damaged by the hot end nozzle if the height is not adjusted properly and if the 3d printed model stick to surface too well it can be challenging to remove it from sheet resulting is a torn surface that will make printing future models difficult.

Glass or Mirror is a perfect printing surface as it heats up evenly and retains heat better than the thin magnetic removable sheet and the surface finish of the 3d printed object coming off is very smooth and glossy almost like glass.  The downside is that it could be more difficult sometimes to remove the parts from the glass surface as it is not flexible and material sticks better to it.  

#4. Bed Leveling and Perfect First Layer

With that said, it brings us to the most important part of 3d printing, bed leveling and perfect first layer.  The success of any 3d printed model depends on the perfect first layer as it is the foundation of the entire 3d printed model structure.  

What is bed leveling on a 3d printer?

Bed leveling is a distance of the hot end nozzle away from the bed on any portion of the bed.  On a perfectly leveled bed the distance between the hot end nozzle and the bed would be equal in the center of the bed and all four corners of the bed.

All 3d printers have some sort of bed leveling feature. Some have automatic bed leveling features and for some you can install an upgrade to have an automatic leveling sensor. Regardless of the type of leveling feature your 3d printed may have automatic or manual it is absolutely crucial to have the bed perfectly leveled before starting the printing process.  

How do you level the bed on a 3d printer?  

  • First you want to bring the nozzle down in the middle of a bed for a starting point. 
  • Get a piece of paper and slide it between the bed and the nozzle.
  • Adjust your bed up while moving the piece of paper back and forth until you feel slight resistance on the paper. Be careful not to crash the nozzle into the bed.
  • Then, repeat this process around all four corners of the bed.  

Here is a helpful video that I have found.

Credit to Hobby Hoarder

After the bed is perfectly leveled you are now ready to start printing but the first layer still may not be the most desirable results. 

How to get a perfect first layer 3d printing?

The printing surface may be perfectly leveled to the hot end and still be too close or too far from the hot end. This little detail may ruin your 3d print right from the start.  So how do you know the difference?   I found this video that does a great job explaining the distance between hot end to the bed and how to identify the difference.

Credit to NWA3D Training and Support

#5. 3D Printing Material Matters

When I first started 3d printing I went through a lot of filament pretty quickly trying to learn the ropes and figure things out.  One major thing that I wish I knew before I started 3d printing is that not all material is the same.  

While this may seem obvious, printing a typical PLA is a whole lot different than printing ABS or PETG or TPU. This was something that I was expecting. What I did not expect was when printing the same type of material for example PLA but switching brands makes a difference as well.  So, a tip for a beginner is find a brand and stick to it and if you wish to change brand be prepared to make some adjustments to your printing profile.  More on that later.

#6.  Slicing Matters

What is slicing in 3d printing?  

When the term “slicing” your 3D model is used it means taking your 3d model design and slicing it into many individual horizontal layers. The slicing software then generates the tool path usually referred to as (. gcode) that the 3d printer will use for printing. Most slicing software will have a print preview of the toolpath to help you prevent print failures.

Slicing Software and pricing:

  • We will start with the most popular choice Cura and it is available for free or if you want the enterprise version its $300 per year subscription.
  • Then we have a Simplify3d at $150 one time charge. This is our preferred choice of slice.  
  • And we also have a list of free slicers

Every 3d printer and every slicer software is different and it all comes into play of the quality results of the finished product.  Every slicer generates its own gcode that determines how the printer is going to print it and not every slicer will be a perfect match to your particular 3d printer.  We suggest you start off with the free versions and try those out first before spending money on something that may not suit you well.  

We have had great success using Simplify3d on ender 3 pro and it is very beginner friendly.  

#7.  3D Print Slicing Profile

What is a slicing profile?  

A 3d print slicing profile is a file (.fff) that stores a group of settings that are used to determine the (.gcode) such as speed and temperatures. Profiles can be modified and saved as with another name for different filament materials types.  Slicing softwares like Simplify3d allows you to store up to 100 profiles.  Free Simplify3d profiles available at our library tab.

The benefit of using slicer profiles is that you don’t have to go back and adjust all the settings every time you print or change to different material.  Just select a new profile and print. Another benefit is that you can make a backup of a settings in a profile for something that works but you want to make some adjustments and not lose the setting you had that work ok.  

#8.  Rafts, Brims & Skirts-

What is Raft?

A Raft in 3d printing is a several layers of material that is printed underneath a 3d printed model that forms a detachable base. A 3D printed model will be printed on top of this raft, instead of directly on the build plate. Rafts are often used to prevent part warping and corners peeling as it usually has a better adhesion to build plate.

What is Brim?

A 3D printing brim is a layer of material that extends along the print bed from the edges of a 3D printed model. Brims help to improve bed adhesion and to prevent warping. Brim is extremely helpful when printing a tall and skinny model brim will help to stabilize it on the build plate to prevent it from collapsing. It is easy to remove, wastes less material than raft and doesn’t affect the bottom layer finish of the print.

 What is Skirt?

A skirt in 3d printing is a number of lines that outline your to be printed 3d model but does not touch the model. The skirt is extruded on the print bed before starting to print your model. Skirts serve a useful purpose because they help prime your extruder and establish a smooth flow of filament. It also allows you to identify if the build plate is properly leveled which may prevent failure of 3d print.

All of these settings can be turned on and off or modified in a slicer settings normally in the “additional” tab.

#9.  Understanding Supports 

What are 3d printing supports?

A support material in 3d printing is a break away or dissolvable extra material that is printed on or by the 3d printed model that supports the model. For example if the model is a T shape then the overhang portion of the T will not be able to print successfully therefore it will require a support material. It is ideal to design 3d printed parts in a way to avoid using supports if at all possible.  

Do you need to use supports in your 3d prints?

Supports are not always needed to be used and should be avoided when possible as it is extra material used that is disposed of when the product is finished printing.  It makes printing time longer and waste more printing material. Support materials do not always break away from the model easily and sometimes may require some cleaning up or sanding after to achieve desired results.  

Most slicer softwares will allow you to disable all supports in general and let you add a specified area of where you may want to add support material.  This may save on print time and filament use if executed correctly.  This video that I found does a great job explaining this.

Credit to makers muse

Can supports be avoided?

Yes, for the most part the support materials can and should be avoided. When designing a model for 3d printing it’s important to keep in mind that a 3d printer has its limitations and design model in a way to avoid a need for support. You can download a guide from thingiverse that you can print and it will show you capabilities of your 3d printer which will guide you with your model design. For example use chamfers and gussets to avoid overhang.  

#10.  Keep an eye on things

When you are first getting started with a new 3d printer I believe it is important to keep an eye on things.  Do not leave your 3d printer printing for a long period of time unattended. I know this is impossible as I myself have done print that was over 30 hrs long.  Things can get out of hand very quickly resulting in a failed print and a lot of wasted material to be cleaned up.  

Most 3d printers now have a pause feature that you can use if you must leave the machine for a long period of time and do not wish to have your model destroyed.  I would highly recommend that you utilize this feature at least until you find out the capabilities of your machine to feel compatible leaving it running unattended.  Most of my print I do now I set the printer to run overnight.  

Hobby,

Whatever your intentions are with 3d printing just remember to treat it as a hobby at least in the beginning stages of it.  It is very much fun and exciting but can be frustrating sometimes. Nevertheless there are many communities that will help you along the way.  Facebook groups, forums, and our blog is always there for you.  

If you found this content helpful please share with others and subscribe so you don’t miss out on our latest post. Please like, comment and share with us your 3d printing experience.  Be sure to check out our download tab above for models and slicer profiles.

Happy 3d printing!